Gigaclear – Installation & Review

After waiting and waiting for Fastershire (Gloucestershire’s BDUK arm) to finally roll out super-fast broadband to my area, it was finally confirmed that we would not be receiving mere FTTC from BT, but in fact full FTTH from Gigaclear!

The Gigaclear order was placed all the way back in December 2015, before any of the work had even started. Then in June of this year, Gigaclear’s contractors began to dig up the side of the road to lay the fibre cabling. Finally, at the end of August, we received this package through the post:

Gigaclear_box

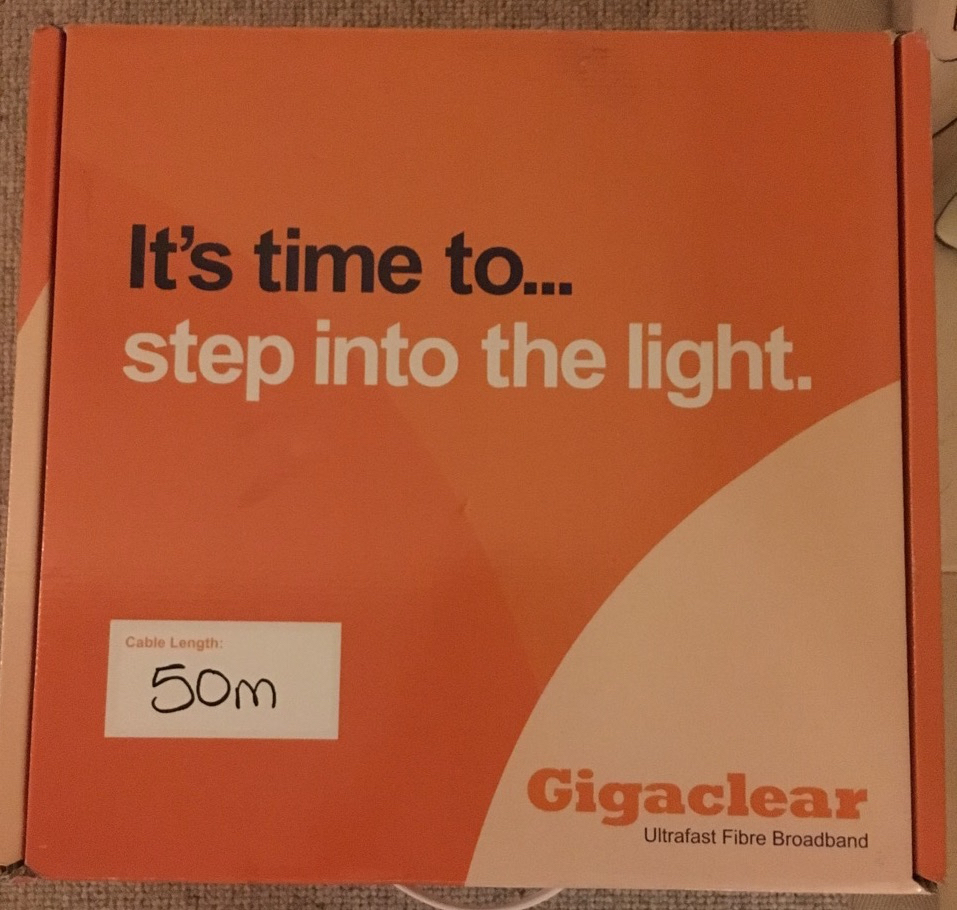
Gigaclear’s self installation kit

The self install kit can be ordered with different cable lengths, ranging from 10 to 50 metres. You can also request even longer lengths up to 100m, but they will charge you for this. Since Gigaclear only bring the fibre cable up to the boundary of your property, they supply the remaining cable for you to bring it into your house.

The pricing options for Gigaclear are not cheap. You have to consider that you are receiving a premium internet connection, and I feel the price reflects this. On top of the monthly price plan, they charge a flat £100 ‘connection fee’ that is mandatory, and then if you don’t choose self install, the installation fee ‘starts from’ £95. So potentially before you’ve even got your internet connection, you’ve spent £200. Most practical people should be able to easily install the service without paying for the installation fee, however, as we did.

The monthly price plans are as follows (all speeds are symmetric):

50 Mbps – £39.90

100 Mbps – £45.25

200 Mbps – £52.45

1 Gbps – £74.00

I opted for the 100 Mbps plan, since it’s fast enough for pretty much everything. A 50 Mbps connection could become limited in the future with 4K video streaming, for example.

Anyway, back to the installation. Within the installation box you receive quite a lot:

Gigaclear_box2

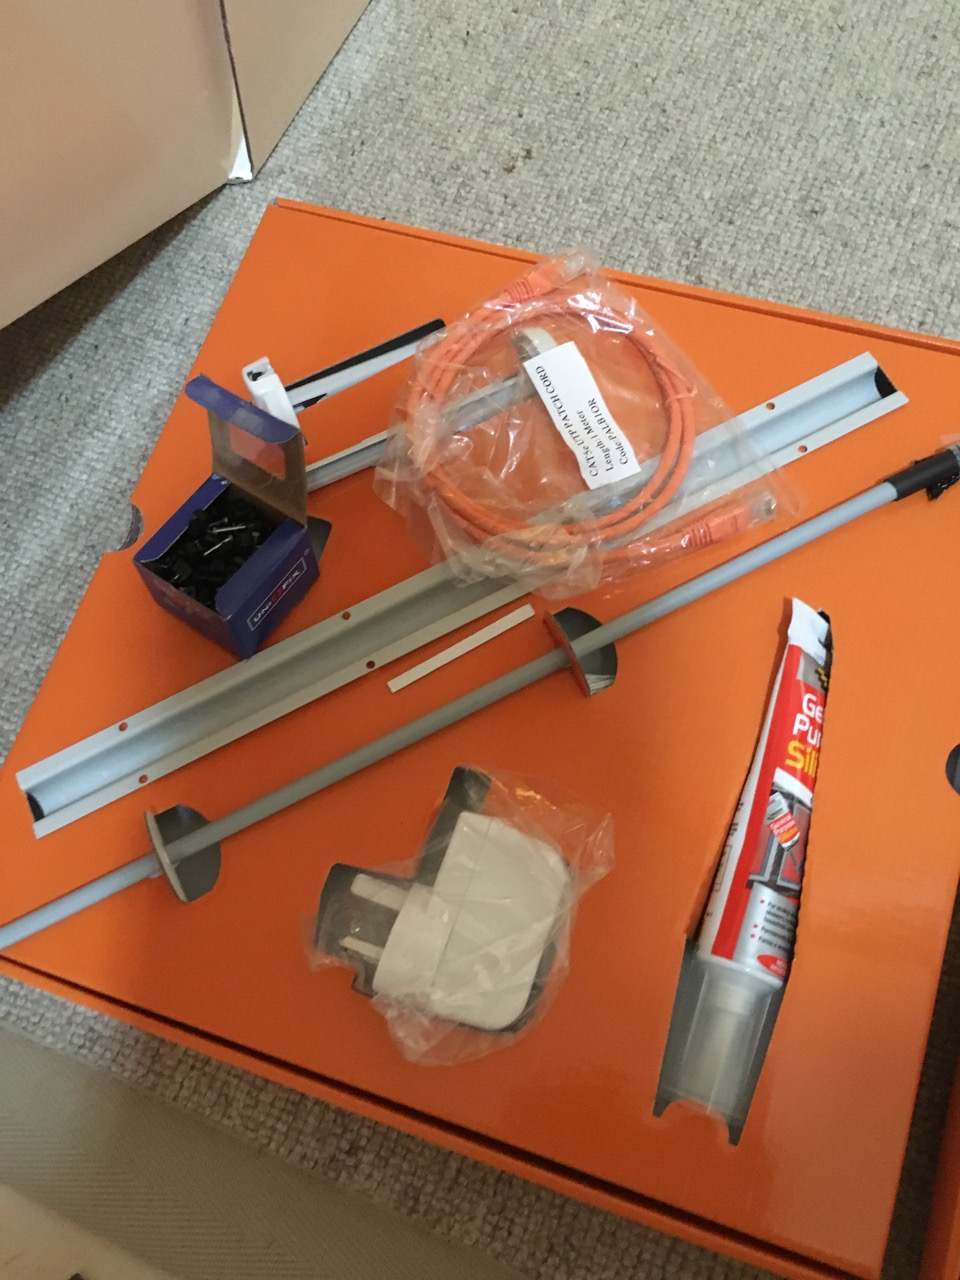
Power supply, ethernet cable, 2 wall entry points, an external cable duct, cable ‘pusher’, silicon sealant, and 100 cable clips.

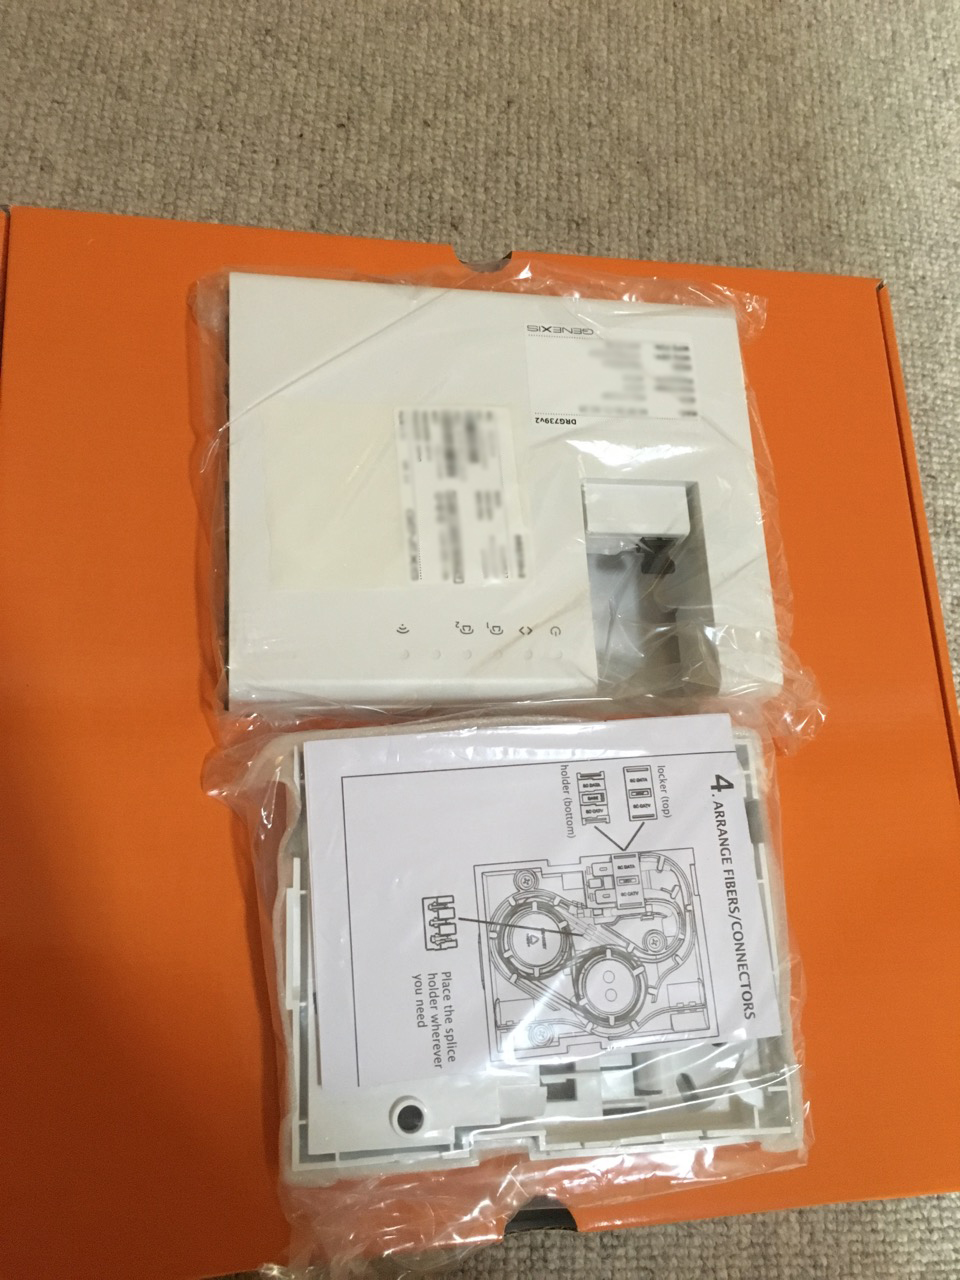
Router and internal wall box

Gigaclear_cable

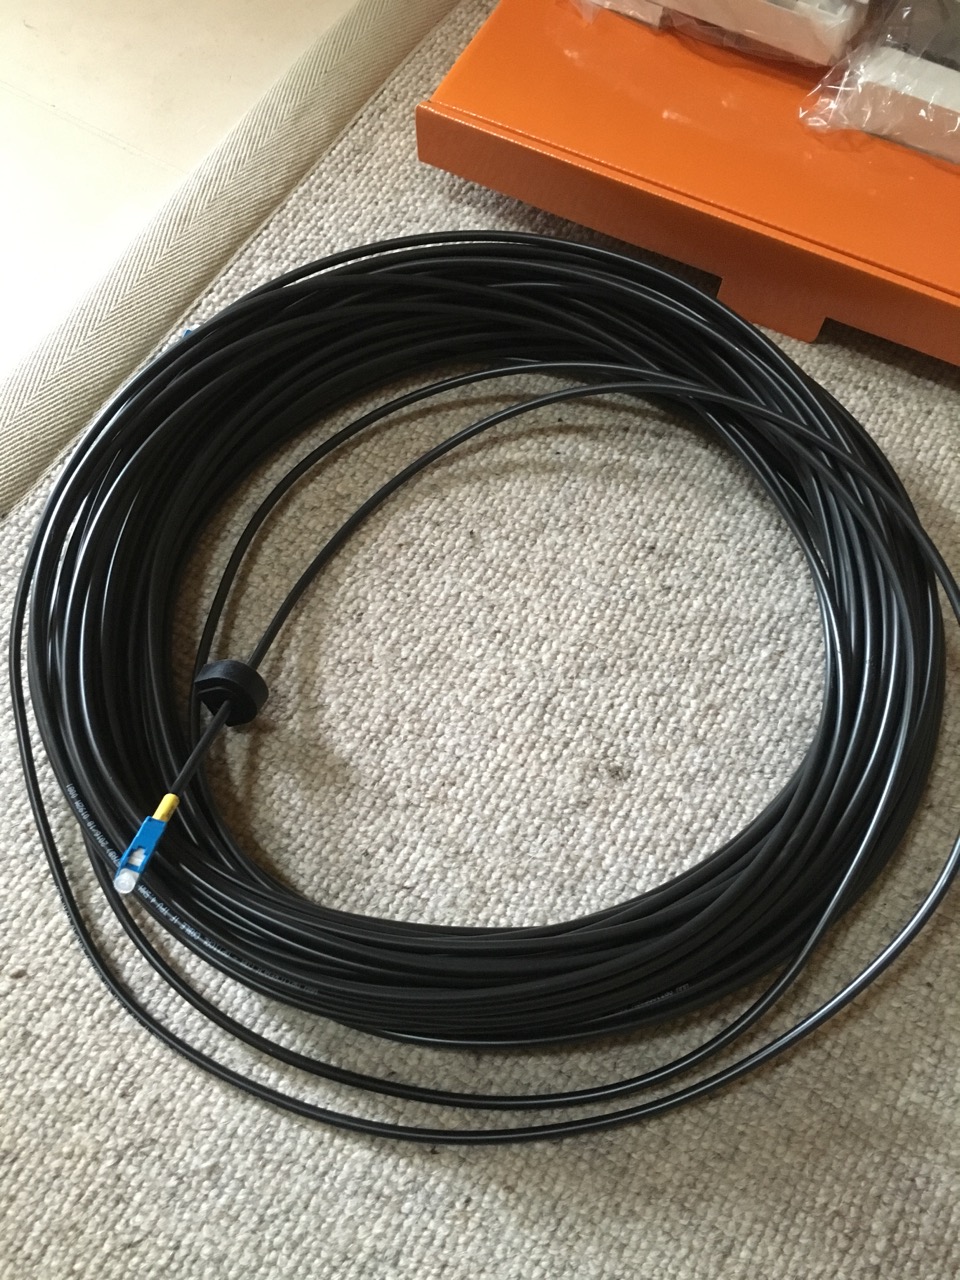
50m of pre-ended Fibre cable

There are fairly comprehensive instructions that come with the box, and at no point during the installation was anything unclear.

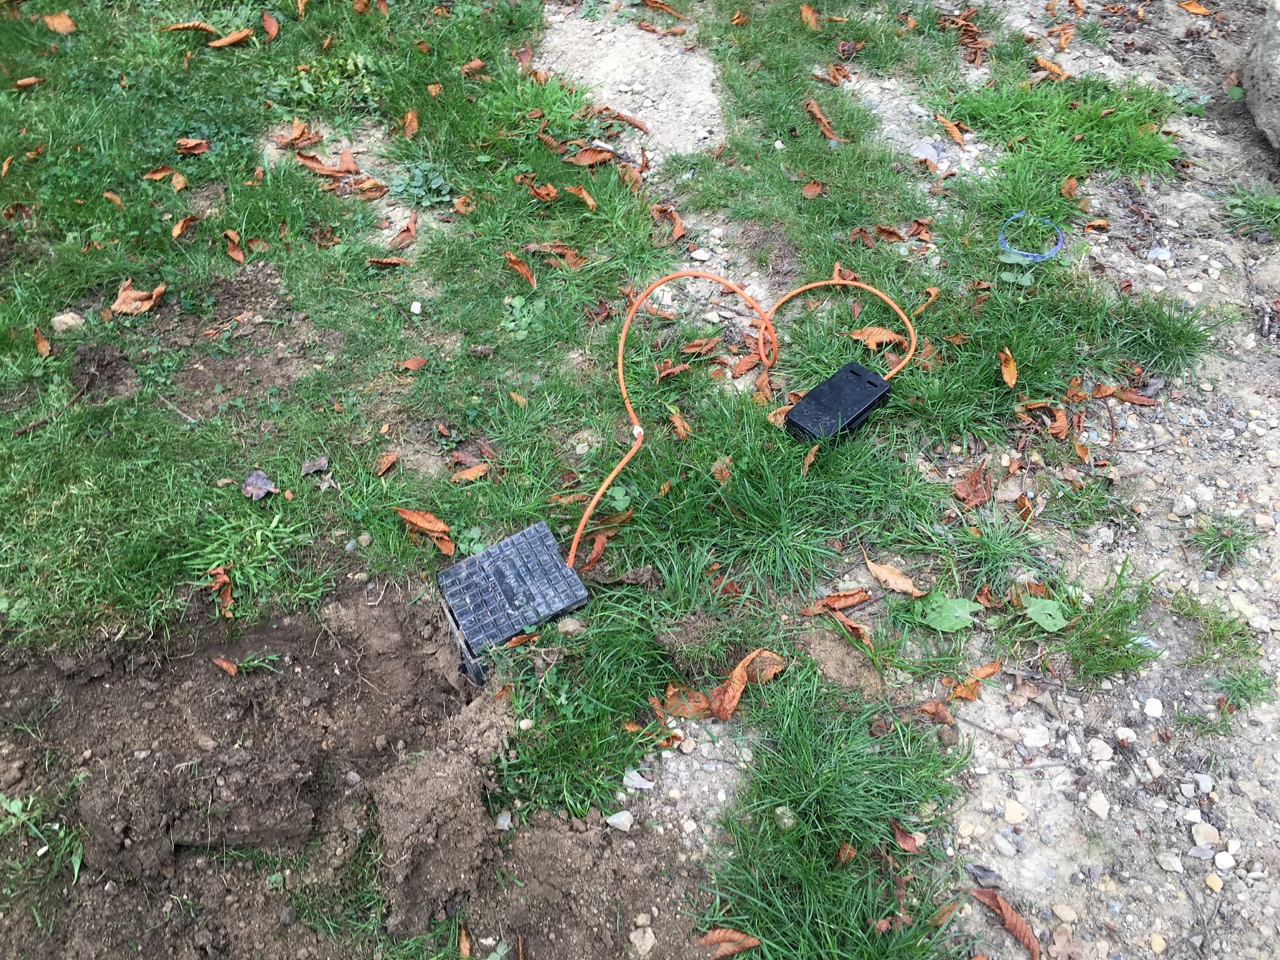
To begin with, we started at the Gigaclear junction ‘pot’ that had been placed on our boundary verge by the road:

Gigaclear_pot

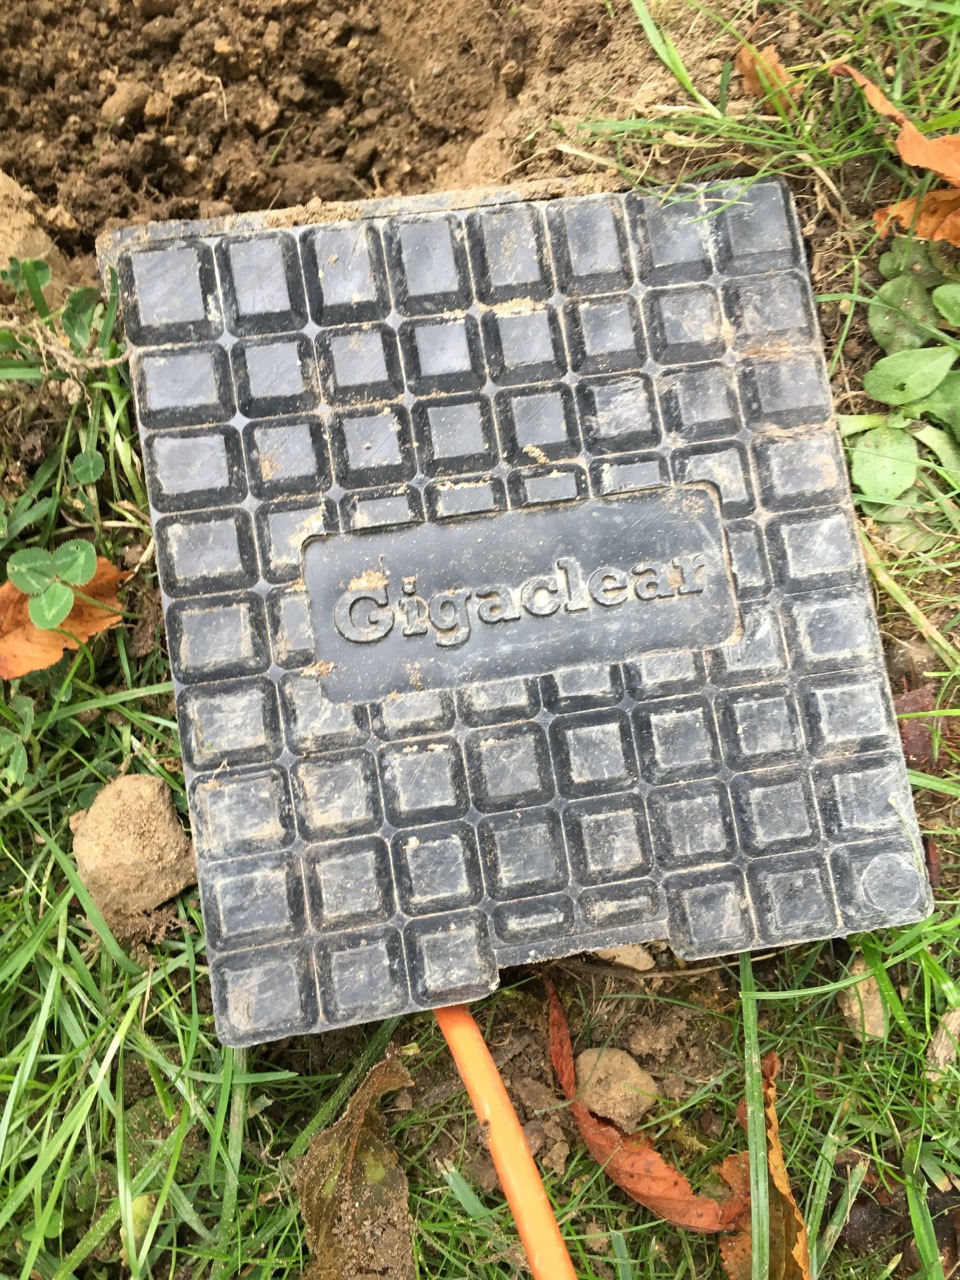
Inside, you will find a smaller black box that contains the actual connection point:

Gigaclear_pot2

Inside the small black box, you will find this:

Gigaclear_connection_box
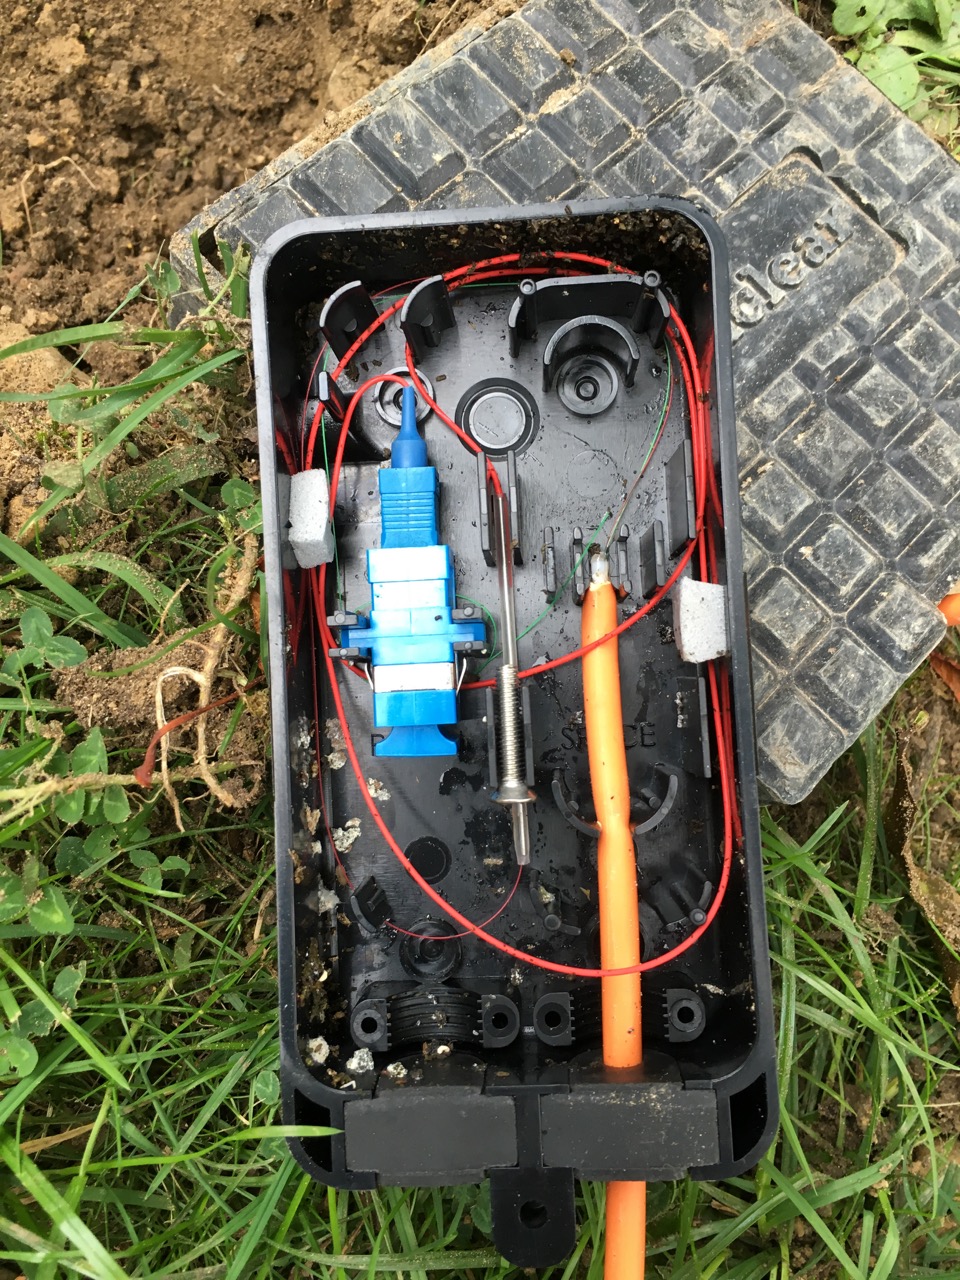
Unfortunately when I opened up the black box, it hadn’t been closed properly, and a slug family had decided to move in. I washed both the box and the lid as best as I could, but you can still see some of the remains in the picture! The lid of the box has a rubber seal that fits tightly against the junction box, and the cable entry points have rubber grommets to prevent water (and slug) ingress. Finally a screw is provided to tighten it together.

Inside the junction box, it looks like there may actually be 2 ‘fibres’ in the orange cable. If you look closely there appears to be both a red and green cable coming out of it. It just shows how thin these fibre cables really are once you strip away all of the insulation (and even these cables have a very thin layer of insulation on). Underneath the screw in the picture, there is a long tube – this is where the fibre cable from the ground is spliced to the cable that goes to the blue connector. You then get the thicker red fibre going into the connector, ready for a customer to plug into.

The connector appears to be the ‘SC’ standard. It clipped pretty easily into the one in the junction box.

Gigaclear_SC_connector

Connector on end of supplied fibre cable

We started by digging a trench from the box to our boundary wall. The Gigaclear ground ‘pot’ has a hole around 2 inches deep behind the hinge, that allows you to feed the cable through. To protect the cable, we placed it inside some hosepipe tubing for the short distance that it was underground. Once at our wall, we drilled a hole through it, and then the rest of the journey we actually just clipped the cable to the back of the wall with the provided cable clips. Digging through hard earth and gravel is extremely difficult without power tools. Plus, the cable is probably safer above ground level in the event of any digging work being done in the future.

Interestingly, I ordered 50M expecting to only use around 30M of it. However, I ended up using almost the entire length of the cable! So I would definitely advise going longer than necessary – fibre isn’t like copper wire so the difference in length of say 25 vs 50 metres of cable doesn’t matter.

Getting the cable inside was easy, so was installing the ‘base plate’ that the router clips onto. The end of the fibre cable fits snugly inside the base unit, and the router literally slides up and makes contact with it. It was all pretty easy for anyone with basic DIY ability.

The finished router mounted on the wall:

Gigaclear_router

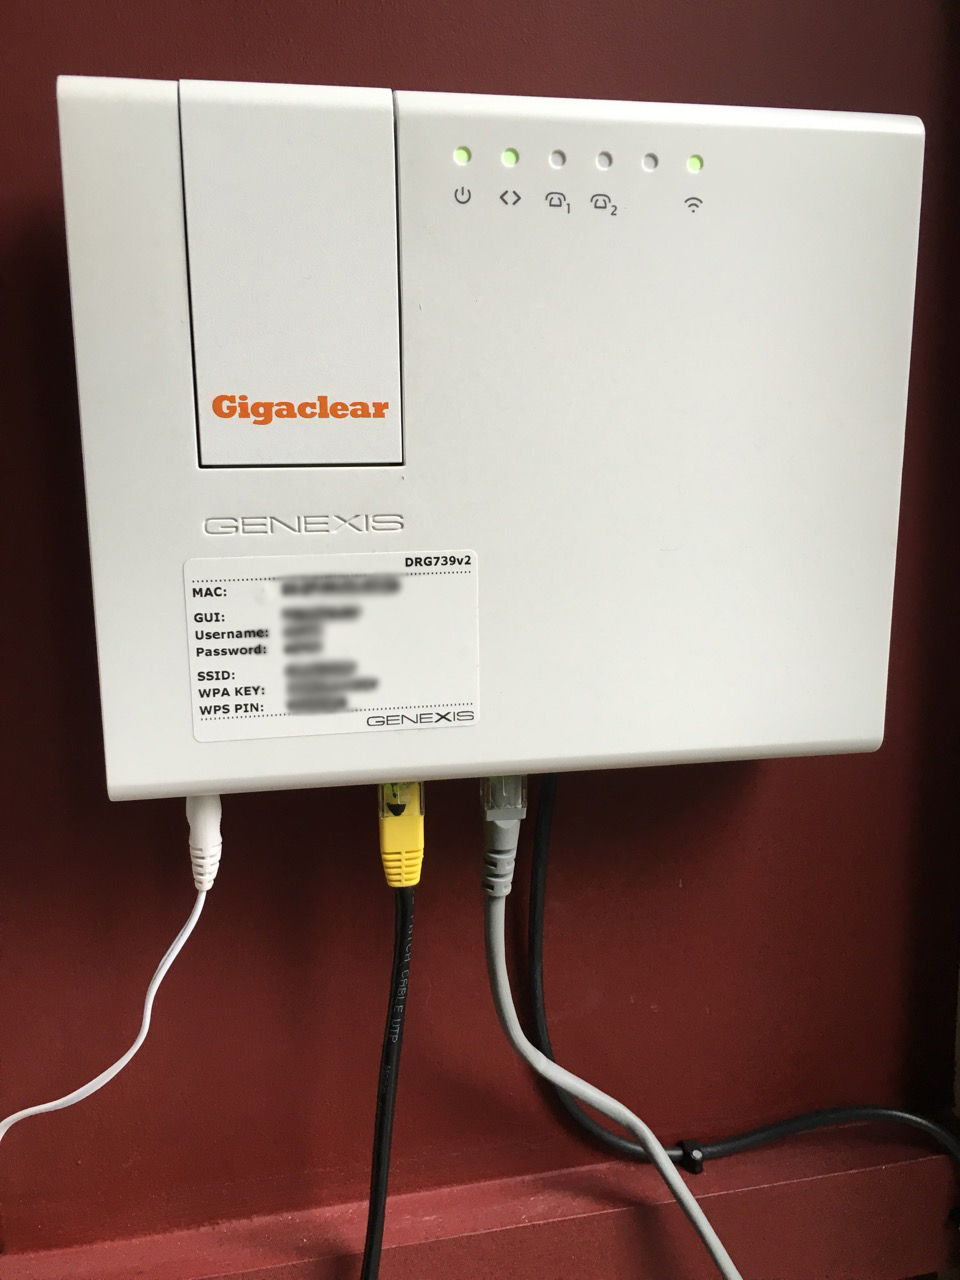
With the installation finished, all that remained was logging on to the internet – you have to enter your address details and Gigaclear customer number first, and then it just worked.

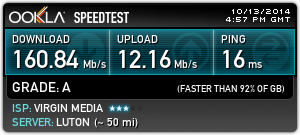
Obligatory speed test result:

Gigaclear_speedtest

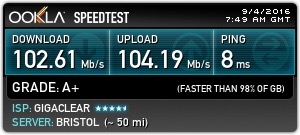
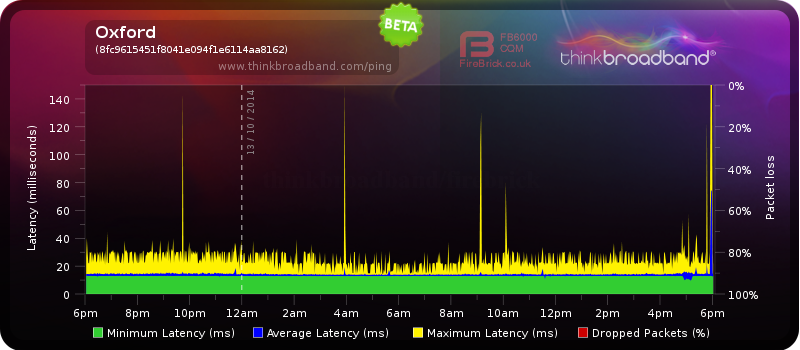
Pretty impressive! The low latency is probably the most impressive thing, since I’ve had experience of GPON installations elsewhere that had much higher latency. Gigaclear uses point-to-point fibre, not GPON, so you’re not sharing the fibre cable with anyone else (at least up until the cabinet, anyway).

It’s also worth noting that like many smaller FTTH providers, Gigaclear offers symmetric connection speeds on all of their plans. Even though BT offer FTTH plans in some places of the country, the upload speeds are not symmetric (I believe they offer a 330/30 service).

The supplied router is reasonable, certainly much better than Telefonica Movistar’s one provided in Spain for my FTTH there (it had extremely slow wifi). The Gigaclear router comes with  2×2 MIMO 802.11ac, obviously dual band 2.4/5Ghz. This is certainly reasonable, though really a 3×3 MIMO product would’ve been better, considering they do offer up to 1Gbps connections. It comes with 4 gigabit ethernet ports, as well as 2 telephone jacks (not used – unless the Vonage service uses them – I’m not actually sure).

The router interface is somewhat locked down: it lacks a few key features such as Dynamic DNS, bridging, and the ability for it to respond to ICMP packets externally. It’s adequate, but the power user in me would prefer something a bit more advanced. Sadly you have to use the provided router, and unlike Virgin Media, who allow you to bridge the connection to your own router, Gigaclear don’t offer this without having to pay for it (which is ridiculous – £4.17 per month).

If we consider the price of the connection, I would expect a few more options to be available without charging extra:

  • A static IPv4 address without charging £2 per month for it. Also, this option is only available on the 200Mbps and 1Gbps packages (Why?). For reference, PlusNet charged me an £8 one-off fee for a static IP on their standard ADSL product.
  • IPv6 support. Gigaclear claims to have built an ‘IPv6 capable’ network, but seem to have not found the ‘on’ switch yet. Sky broadband, who I am switching away from, offer IPv6 to pretty much all their customers, and BT are very soon rolling it out to their customers. Meanwhile most small ISPs have been offering IPv6 for much longer. It might not be important to many people, but it’s one of those things that should be standard on a ‘next generation’ internet connection.
  • Bridging mode. This is only available to Business customers who then have to pay an additional monthly charge. Why? Virgin Media offer a bridging / router only mode to all of their customers by default, without charging for it. Surely this is a feature that could be enabled without any actual ongoing cost in the router interface itself?

Aside from these minor gripes, the connection is otherwise excellent. It does annoy me that I am downgrading my internet connection in some areas, whilst improving it in others. The lack of a dynamic DNS client built into the router is probably the most annoying of the problems. It just means I have to run a client on a computer all the time.

So would I recommend Gigaclear? The answer is absolutely yes. Despite some flaws that won’t effect 99% of people, it delivers a vastly superior connection compared to pretty much anything else out there at the moment.


Virgin Media: 152 Mbps

3829132984

I have Virgin Media at my student property. Because it’s shared between 8 people, we decided to go for the fastest package. And it certainly doesn’t disappoint.

I quite like how they provision the service to be faster than what you actually pay for. The cable modem is synced around 168 Mbps, which allows for various overheads, and results in them selling 152. But it’s clear that 160 Mbps is easily attainable, even during the ‘rush hour’ period around 6pm UK time.

Latency is equally impressive, see this ping graph from thinkbroadband.com:

8fc9615451f8041e094f1e6114aa8162-13-10-2014

The few blips near the end are probably me using Speedtest. Even in the evenings the latency is almost always below 30ms, with an average below 20ms.

The only minor letdown with the service was the supplied wireless router. Even though it was their new 802.11ac one, it lacked effective wireless range, probably due to built-in antenna. I purchased a separate wireless router and put the SuperHub into modem-only mode, which results in far superior wireless coverage. Even though my computer has an 802.11ac card, ac wireless doesn’t work in the 2.4Ghz spectrum, and I can’t use the 5Ghz band since it lacks wall penetration (I get faster wi-fi speeds on 2.4Ghz N rather than 5Ghz, even though 2.4 is very congested).

The best thing, in my opinion, is the price. £39pm may seem steep, but it doesn’t require telephone line rental (around £15 usually). It’s literally a no-brainer to go with Virgin if you don’t require a landline, since BT Infinity is both slower (*apart from upload), more susceptible to line length, requires an 18-month rather than 12-month contract, and is also more expensive once you factor in that line rental.

New PC build

My old desktop PC has served me well for almost 4 years. However, technology from 4 years ago is now pretty much considered ‘ancient’ (well, not really – but you get my point) and so I decided it was time to build a new one.

I use www.overclockers.co.uk to select all of the parts for any PC build. They generally offer good prices as well as a wide range of ‘higher end’ components suited towards enthusiast PC builders. I also like the fact that they remove VAT at website source for us Channel Islands customers.

Selecting the parts:

Picking the parts for a build can be quite challenging, with so many different options to choose from. I generally start with the processor and work from there. The most important thing in my opinion is to ensure you buy a processor from the latest generation. There’s not really point in paying money for a CPU that is effectively 1-2 years old already. At the moment, the latest Intel generation is “Haswell” – a 22nm process, and Intel have just recently released a refreshed line of desktop class CPU’s to carry us through until they release the newer 14nm Broadwell chips in 2015.

I normally go to OCUK’s website, select the latest CPU generation, then sort by price. Some CPU generations have much larger price variations between the highest end, and the mid-high end. To me though, with Haswell, the price difference between the top CPU and the mid-end doesn’t seem to be as drastic as previous generations were. With this in mind, I decided to go for the i7-4790k (quad core w/ Hyper Threading), the current top-end chip offered by Intel. It is fairly reasonably priced for their flagship desktop CPU, with a base clock speed of 4.00 Ghz and turbo boost up to 4.40 Ghz. Additionally, this new release was supposed to have better thermal material to allow for superior overclocks – more on that later.

Once I picked the CPU, the next logical step is to choose the motherboard. This can be extremely confusing, with a whole host of different codes (e.g X79, Z87, B75, etc). The first thing is to narrow it down to match the CPU socket – in the case of Haswell, socket 1150. Then, you want to find out which generation (marked by the number code) of motherboard is appropriate to your CPU. The easiest way I have found is to search the socket type on Wikipedia, which usually brings up a table of the different chipsets from best to worst. In my case, I opted for the Z97 chipset, which should also be compatible with Intel’s next generation CPU’s, for better upgradeability.

Finally, it is time to choose the graphics card. This time round, I already had a new card so I didn’t need to buy one for this build. However, if you are buying a new card for a gaming PC, I advise to search for card reviews on the internet and get a really good idea of the state of things before making any purchases – price doesn’t necessarily translate into performance, and sometimes cheaper cards can end up being better or on par with the more expensive ones (e.g. R9 290 vs 780).

There are lots of other components you will need, of course 😉 , but these are probably the most important ones to settle on at first.

Parts List:

Intel Core i7-4790K 4.00GHz (Devil’s Canyon)
Asus Z97 Pro Motherboard
Corsair Vengeance Low Profile 16GB 1600MHz Dual Channel
Corsair AX760i Digital ATX Modular Power Supply
Corsair Hydro H100i Liquid CPU Cooler
Samsung 512GB SSD 850 PRO
Phanteks Enthoo Primo Full Tower Case (White)
Hazro HZ27WD-V2 10-Bit 27″ 1440p LED Monitor

Plus an existing R9 290 graphics card and a 500GB storage HDD.

Build review:

Sadly I didn’t take any pictures during the build, but I will instead try to give a review of how easy each component was to install. The first thing to unwrap is usually the case itself. In my case, the Phanteks Enthoo Primo. It really is massive in size, and far larger than even I was expecting. If you’re used to a large tower, the Primo seems to be even larger! However the size of the case does mean that it comes with plenty of room to work with internally, and some fantastic cable management features that are great for OCD’ers like me. The case is not just tall, but also quite wide – allowing even thick cables to be well hidden behind the motherboard. It’s also clear that this case was built with cooling in mind, there are literally 10’s of locations for fan mounting and I believe at least 8 (single slot) rad mount locations for water-cooling. The overall build quality felt fantastic: everything felt really solid, even the removable side panels didn’t bend when trying to add or remove them. Another feature of the Primo is the PWM fan hub that allows all of the case fans to be controlled from a single fan connector on the motherboard. The PWM hub comes with a 4-pin cable to connect to the motherboard, and the Z97’s fan connectors all seemed to be 4-pin PWM capable. You can connect the PWM hub to a molex connector as well, but this didn’t seem to be necessary if your motherboard can supply enough power on it’s own. My closing thoughts for the Primo are overwhelmingly positive. I don’t think I actually have any complaint about it. Perhaps a slightly better instruction guide could be included, since it wasn’t completely obvious what all the cable connections did at first (e.g. connecting a SATA power cable to the ’12v’ connector so that the lighting works!).

My second component to get out the box was the Asus Z97 Pro motherboard. I decided to install the CPU into the board before mounting it, and at this point I want to point something out that should’ve been obvious but still surprised me nonetheless. I purchased an OEM CPU, which means in practice that it doesn’t come with an included heatsink & fan. However, the CPU was included in a tiny un-sealed cardboard box with just a small piece of foam to protect it (no sealed plastic or even dust cover). I guess that’s what you get for paying less money for the OEM version! It does make you wonder, the chip could’ve been used previously and I wouldn’t know… Just for extra piece of mind, I decided to clean the top of the CPU heat spreader with some solvent cleaner before installing. Now back to the motherboard – you can’t really say much about it to be honest. It felt sturdy. Plenty of SATA ports (all 6G). It had, as far as I could tell, 2 USB3 headers and 2 USB2 headers. It had plenty of fan connectors (CPU, CPU_OPT, and I think 4 chassis fan headers?) all of which seemed to be PWM capable. Now skipping ahead slightly, onto the BIOS software. I’ve always liked ASUS bioses for some reason, probably because I’m just familiar with them. But all of the usual features were there, so I won’t bore you. I did like the new ‘homepage’ which displays the current CPU temps on a graph, as well as fan speeds. A nice addition.

The next component is the Corsair H100i liquid cooler. I’ve never had any sort of water-cooling in a build before, and I’m too nervous to go for a custom water build in case I broke something(!), so buying an integrated water cooler seemed like a logical step. Unfortunately this part of the build was the least satisfying in terms of ease of installation and in some ways, performance. The first step was screwing the radiator onto my case. It turns out that the screws between the case and radiator screw partially into the radiator fins. To me this just seems like slightly sloppy design. Next, you had to install the rear retaining plate on the back of the motherboard. Unfortunately, the Asus Z97 motherboard seems to be thinner than Corsair were expecting and, as a result, there was significant slack between the retaining plate and the motherboard even after tightening the screws fully. Sadly, the H100i comes with no spacing washers for this purpose, and I’m sure the Asus Z97 isn’t some sort of ‘odd one out’ motherboard either. After procuring some washers out of the garage, the retaining plate finally fitted snug against the rear of the motherboard. Next, was to mount the cooler itself. The H100i comes pre-pasted with thermal compound, and I decided to just use that rather than clean and re-apply something different. Installing the cooler itself was relatively easy, it slots over the CPU and you just tighten the screws to secure it onto the backplate protrusions. Finally, screw the fans into place on the radiator. Next I had to connect all of the various cables onto the cooler. There is a SATA power connector cable, a single pin connector that goes onto the CPU fan header, and then a micro-USB socket that talks to the Corsair software. There are also 2 sockets for fan connections – the supplied fans HAVE A COVER PROTECTING THE CONNECTION PINS which you need to slide off. I literally spent 20 minutes searching the internet as to why my fans wouldn’t connect onto the cooler. This is why -_-. The supplied micro-USB cable connects to a motherboard USB header. All seemed to be well. Sadly, after booting windows and installing the software, it couldn’t find the cooler… After literally HOURS of searching corsair’s forums, I came across the reason: Windows 8 has a power saving feature (urgh, typical crap) that disables the USB devices from working properly. You need to do a registry hack to get it to work, unfortunately. This is incredibly shoddy from Corsair and I would’ve expected far better to be honest. On top of that, the supplied software seems somewhat.. basic? Updating the H100i’s firmware is also a hassle – the supplied software doesn’t seem to have an auto-updater (or didn’t, until I downloaded their beta version) and I got a whole host of random error messages during the firmware update process. Also, setting up the fan profiles on the H100i resulted in unexpected behaviour – the profiles basically didn’t work properly so I decided to just stick it in ‘default’ mode which works reasonably. Finally, let’s talk about the fans. Oh dear Corsair, WHYY!? The supplied fans, at least in my case, are NOISY. And I don’t mean loud as in ‘air noise’, but in fact a distinct ‘rattling’ noise that has, on the forums, been likened to an idling tractor! The fans actually rattle. I have never seen a brand new fan make a rattling noise – again, really shoddy, and sort of defeats the point of having water cooling (for quieter fan speeds?). It is definitely the fans, since if you unplug them, the pump seems almost silent. In the future, I might use the Phanteks case fans instead of the corsair ones, though I will likely lose control of them through the Corsair Link software (not a particularly bad thing, might I add…). The performance of the cooler is OK, though I was expecting better temps under load. Then again, the Haswell’s are renowned for bad thermals, and in credit of the H100i the water temp in the loop only increased a few degrees between idle and load (i.e. the IHS of the CPU is likely the limiting factor here).

The other components, such as the RAM and SSD, are harder to review really. Both of them slotted into place easily, and in the case of the SSD it has fantastic performance, as to be expected.

My final component comment is for the Hazro monitor. There are a number of positive and negative things about it. On the positive side, the image quality is in my opinion fantastic. Great, deep colours, good brightness and contrast, and the 1440p resolution is a definite bonus over an existing 1080p monitor. However, there are a number of negatives, the main one being the incredibly poor stand that comes supplied with the monitor. It has zero adjustment whatsoever. Not even a basic tilt function – and this was an issue, since by default the screen was actually ever so slightly angled forward when sitting on a desk – a completely unusable display! I had to prop up the front of the stand with a book… It meant I had to purchase Hazro’s £50 VESA stand, which solves this issue, but at a cost. Additionally, the monitor settings are fiddly to use since they are behind the screen and you can’t see what each button does. Of course, on the positive side, the screen is relatively cheap, considering it is a 1440p IPS panel. And that is pretty much all you get – you are compromising additional features for the panel itself. Having said that, the monitor does come with built in speakers(!?) which seems odd given they spent money on that but not on a basic tilt function.

Overclocking:

I am not an experienced Overclocker, and as such I wasn’t expecting too much improvement on the base clock speed of 4Ghz. To me, stability is far more important than getting that last 0.1 Ghz. With the Haswell generation, your only overclock options are adjusting the CPU multiplier and the core voltage (there are probably others, but those are the main ones). The BCLK frequency, which is the equivalent of the old FSB, should be left at 100Mhz. I started with a core voltage of 1.20v and a multiplier of 45x (giving a base clock speed of 4.5Ghz). This resulted in some instability so I upped the volts to 1.25v, which seemed to work perfectly.

In terms of temperatures, overclocking didn’t add that much onto them. Probably because I wasn’t seeking an extreme overclock and my voltage was fairly low by enthusiast standards. Unfortunately I can’t remember the exact load temps with P95 large FFT test (let’s be honest, small FFT is not exactly realistic for most applications), but I think they were all sub 70 degrees under load, which was fine for me.

Closing Thoughts:

I am really happy with my new build. The framerate improvement in a number of CPU limiting games was around 40-50% compared with the i7-930. I am considering getting a second GPU for a crossfire setup, since the 1440p monitor is somewhat taxing on a single card, though prices for the 290 will begin to fall (hopefully) as Litecoiners begin to sell their units.

Javascript Benchmarks – March 2011

Quite recently, Microsoft pushed out its latest release of Internet Explorer. IE 9, the brand new, all improved browser which is meant to be faster and more compatible with everything, was released to the general public a few weeks ago.
I’m not going to go into a detailed review of IE 9: I admit, it’s actually pretty good. What I actually want to look at is how fast IE 9 is compared to the latest browsers currently out there.
I decided to run two javascript benchmarks: Mozilla’s ‘Kraken’ and Webkits ‘Sunspider’. Kraken is designed to push the browser to its limits, testing future compatibilty, while sunspider tests more ‘everyday’ jasvascipt.
I ran all tests on the same Mac, as well as IE9, except this was in Bootcamp, obviously…
The results are here: (smaller bars are better)

For the overall score, I ranked each browser from 1st to 6th on both tests, then added the score. So firefox came 1st and 2nd, so gets an overall score of 3. Safari came 4th and 6th, so gets an overall score of 10.


Well, it seems clear that Safari, which was once near the top of the speed tests, is now lingering at the bottom. Firefox 4, the latest Mozilla creation, fares very well in both tests. Internet explorer 9 comes somewhere in the middle: It is much better than IE 8, now easily competing with all the ‘proper’ browsers. Infact, it came ontop of the benchmarks for the Sunspider test (although there are claims that Microsoft cheated with one of the units in this – try googling it!)

Anyway, if you want the best browser for now, it’s Firefox 4 (though it’s not yet a stable release, though RC status is pretty close). But if you’re looking for something slightly more stable, then Google’s Chrome is still the best current browser to be at the top of the benchmarks.

Apple iPhone Bumper

My free iPhone bumper arrived last week – Finally! I ordered it near the end of August, so it’s taken a good month to arrive…
The bumper itself is pretty good. It’s well made and pretty sturdy (as you’d expect from any apple product hopefully!). It does also protect the back of the iPhone, as the rubber bit slightly raises it off the desk when you put it down to prevent scratches to the back.